Saturday, June 16, 2012

Healthy Father's Day breakfast - Crunchy Oat & Wheat Waffles with Homemade Blueberry Syrup

Looking for a healthy Father's Day breakfast that's filling and tasty?

My in-laws make these waffles for us each time we come into town.  While these waffles are filling and ever so tasty, they are deliciously light and fluffy, and you'd never guess they were made from oats and wheat flour!  


Waffles
1 c. boiling water
3/4 c. regular rolled oats
1 1/4 c. whole wheat flour
1.5 t. baking powder
1/2 t. baking soda
1/2 t. salt
3 T. vegetable oil
2 T. sugar
1 egg
1 egg white
1 1/4 c. nonfat butter milk OR 1 1/4 c. lowfat milk with 2 t. lemon juice added


In microwaveable bowl, boil water, then add oats and set aside for 3 minutes. 
In another bowl mix flour, baking powder, baking soda, sugar, and salt. 
Whisk oil into the oats then add egg and white, then add buttermilk and mix. 
Add dry ingredients and gently mix. 


Cook in waffle maker - use vegetable cooking spray if needed. 
These work especially well in Belgian waffle maker.


Homemade Blueberry Syrup
1 c. sugar
2 T. cornstarch
1 c. water
1 c. blueberries
1 T. butter
1/2 t. vanilla

pinch of nutmeg
pinch of cinnamon


Place sugar and cornstarch in a medium sized saucepan, and mix using a whisk. 
Add water and bring to a boil, stirring occasionally. 
Add blueberries and bring back to a boil.
Add butter, vanilla, cinnamon and nutmeg and serve.


Posted by Picasa

Cinnamon Rolls

I found this recipe on Rachel Berry's blog and they turned out really great.  Other than my pumpkin spice rolls, every cinnamon roll recipe I've tried has been somewhat disappointing.  Happy to finally have a staple cinnamon roll recipe - thanks Rachel!

While I've kept the ingredients the same, I made a few alterations to the combination and mixture process to  speed up the process (since I'm such a patient girl).
My daughter (and toughest critic) couldn't believe that I didn't buy the pastry part - and she recommended that I open up a cafe to serve these (even though cinnamon rolls aren't her favorite - love that kid!)


My photo is the naked/unfrosted version.  Once I got them frosted, they flew off the plate! 
Cinnamon Rolls

2 C. boiling Water
1/2 C. brown Sugar
1 C. butter or margarine
1/4 C. white sugar

2 Tbsp yeast
1/2 c. warm water
pinch of sugar

2 eggs slightly beaten
1 tsp. baking powder
1 tsp. salt
7 C. flour 


Boil water.  Add butter to boiling water and let sit to melt for a few minutes.  
While butter melts, in a small bowl bowl mix yeast, water, and a pinch of sugar and allow to proof for 5-10 minutes. 

Add sugar to butter/water and mix, then add 2 c. flour, one cup at a time to cool down mixture. Once mixture has cooled down (should be warm, but not hot), add eggs, baking powder, and salt, and then yeast mixture. Add 5 more cups of flour, mix thoroughly, cover and set aside to rise. 

  Carefully put raised dough on Oiled or floured surface and using rolling pin, roll out to 1/4" thick.  Brush dough with melted butter, and liberally sprinkle with brown sugar, making sure to cover the entire surface.Sprinkle cinnamon over entire surface. 
Roll tightly, and cut into 2" rolls. (I use dental floss for a clean cut) 
Place on a greased cookie sheet. 
 Cover with saran wrap that's been sprayed with cooking spray, and let rise.  
Bake at 375 degrees for 18 minutes.
Makes 24-30 rolls

Optional - nuts and raisins can be added to the cinnamon and sugar layer if desired.

Frosting:
3/4 C. Soft butter
3 C. Powdered sugar
1 Tbsp. Vanilla
Pinch of Salt
1-2 Tbsp. Milk

Mix well with electric mixer - it should be thick and creamy.

*Rachel noted that refrigerating this dough beforehand (ie overnight) isn't as effective. 
 Posted by Picasa

Crustless Coconut Cream Pie

I found this recipe on Cooks.com this week as I was searching for a coconut pie recipe.  I didn't want to bother with a crust so this was definitely experimental.  
I added a bit of extra flour and more coconut (2 c.) than the original recipe called for as it seemed a little too thin.
As I waited for it to cool, I initially thought that it was maybe too soft of a set, but my loyal eaters loved that half of the pie was chewy coconutty, and the other half was sweet custard goodness.  
3/4 stick butter, melted
1.5 cup sugar
2.5 T. flour
3 eggs
1 can evaporated milk
1 t. vanilla
1 - 2 cups shredded coconut

Mix butter, sugar and flour in a large bowl.
Add eggs and mix, then add remaining ingredients.
Mix well.
Pour into well greased, well floured 9" pie pan.
Bake at 375* for 45 minutes.
Cool for 3 hours, then serve.
Posted by Picasa

Wednesday, June 13, 2012

Buffalo Wings Pizza

While visiting SLC, we recently had buffalo hot wings pizza. We had some fun experimenting and came up with this tasty rendition.  Hot wing sauce and all...yum  Can't wait to make it again!


Pizza crust
1 Tbs. dry yeast 
1 c. warm water
1 t. sugar
2 T. oil
2 1/2 c. flour
1 t. salt

Mix all ingredients and set aside for 5 minutes. Oil pan or pizza stone, then sprinkle with corn meal (if desired), and push dough out out onto pan/stone (or cookie sheet.) Bake crust for 20 minutes at 400*. 

Remove from oven and cover with sauce and toppings (below) 


Toppings and Sauce
1-2 c. chopped or shredded cooked chicken
8 oz. cream cheese
1 c. Frank's hot wing sauce
Shredded cheese (whichever you prefer on pizza or have on hand excepting goat, feta etc)
Any desired additional toppings (olives, mushrooms, onions) chopped

Place cream cheese in microwave safe bowl and soften (30 - 60 seconds) 
Add 1/4-1/2 c. Frank's hot sauce (to taste) to the cream cheese, and mix
Spread cream cheese/hot sauce mixture over crust with a spoon or spatula.
Add chicken and any desired toppings
Apply thin layer of shredded cheese
Drizzle remaining Frank's Hot sauce over entire pizza - more or less depending on your heat thresh hold. 

Return to oven for an additional 10 minutes or until cheese is melted. 

**Variation: Blue cheese dressing (not mixed with hot sauce) can be substituted for the cream cheese sauce, and blue cheese crumbles can be sprinkled over the pizza after the hot sauce.

Tuesday, May 22, 2012

Root beer float cupcakes

My kids gave me a 101 gourmet cupcakes in 10 minutes cookbook by Wendy Paul for Mother's Day.
My kids have really enjoyed looking through all of the photos and the options.
I'm taking these in to school for a birthday and an end of the school year party.
 

1 white cake mix (unprepared)
1 c. root beer

Mix together and spoon into cupcake papers
(I know it seems weird - no eggs, water, or oil, but it really does work)
Bake at 350* for 15-18 minutes
Cool

Frost with Butter Cream Root Beer Frosting
1 stick butter
3.5 c. powdered sugar
1-2 t. root beer concentrate or flavoring (in the spice aisle at the grocery store)
3-4 T. milk

Beat butter until soft and fluffy - approximately 30 seconds
Add powdered sugar, and slowly incorporate
Add milk and root beer flavoring to desired consistency

Frost cupcakes and garnish with straw, pirouline cookie straw, and small white decorating beads for bubbles
Posted by Picasa

Wednesday, May 2, 2012

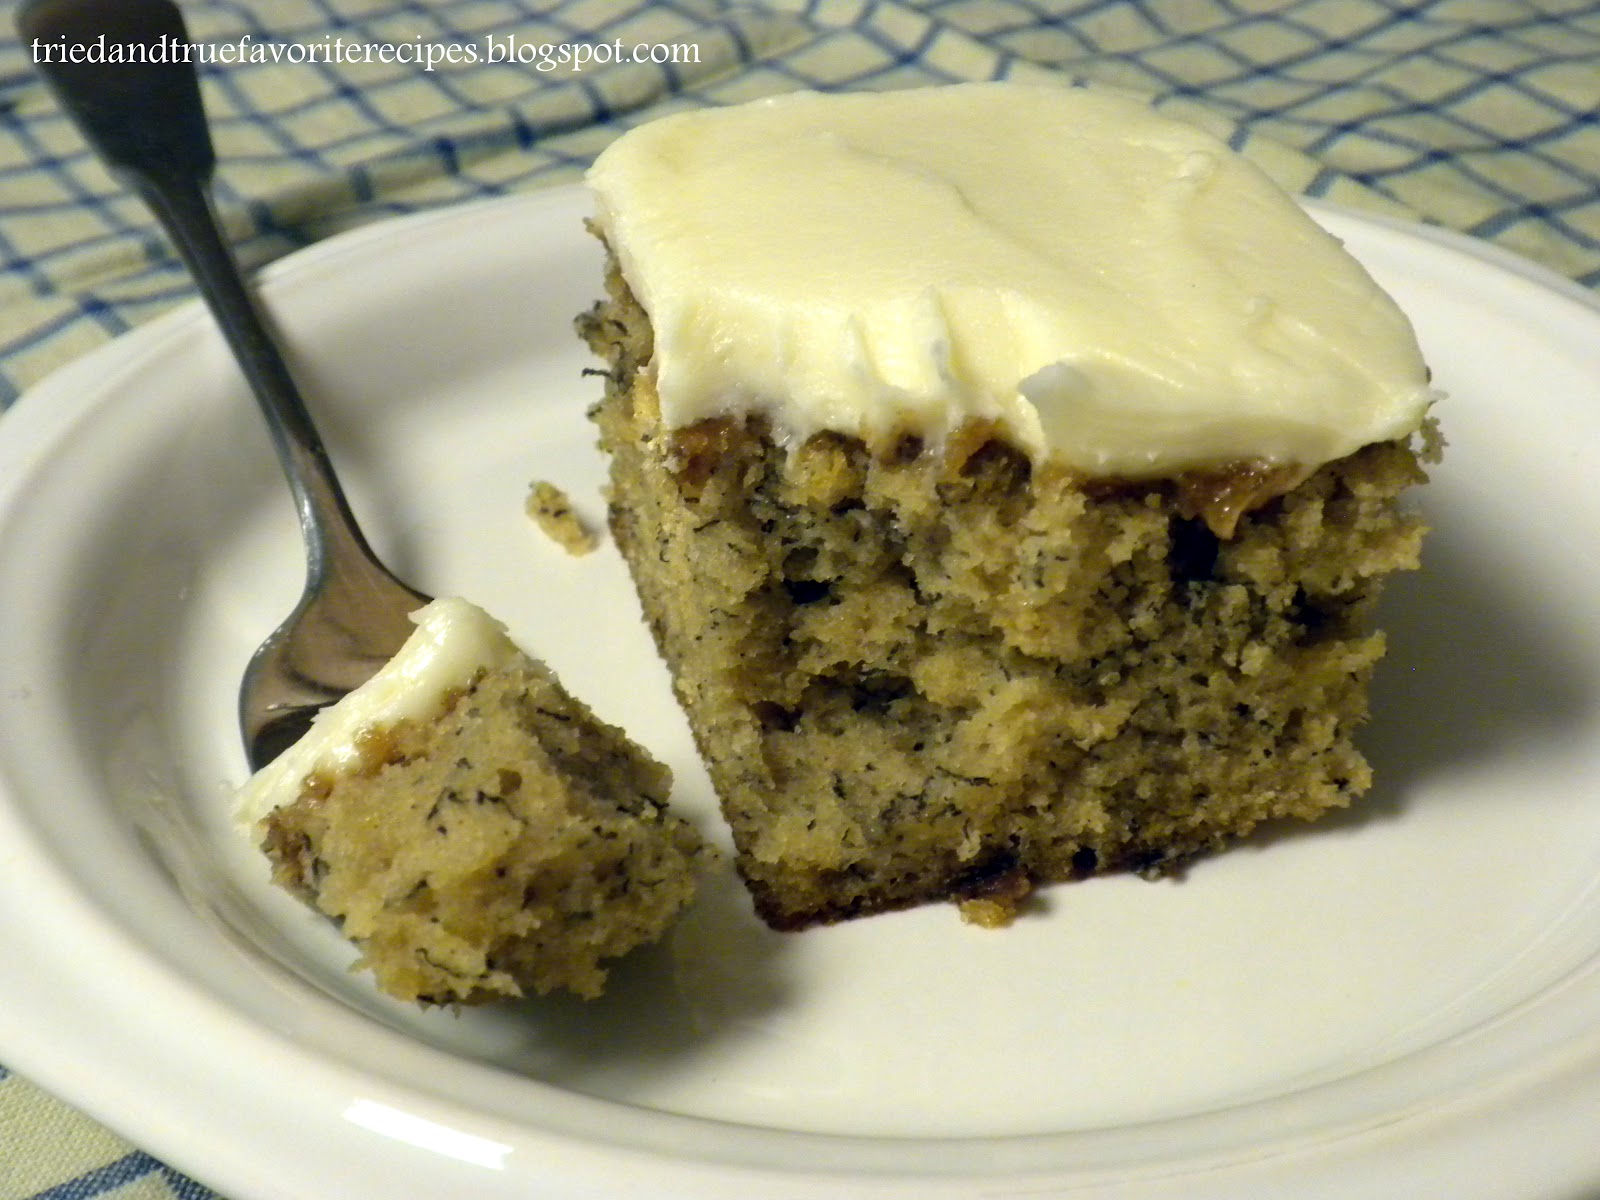
Banana Bars with Cream Cheese Frosting


I originally found this recipe in a Betty Crocker cookbook I received when we were first married.  It comes in doubly handy when I need to feed a crowd, and when I have some ripe bananas on my counter that have passed the stage of raw consumption.  Over the years, this recipe has been adjusted with changes to the sugar, oil, nuts, and doubling it to fit an 11 x 15" pan.  
Reminiscent of banana bread, this can be served in bars, or as a cake, and with or without frosting.  

2    cups brown sugar
4    very ripe bananas (brown is okay)
2/3 cups vegetable oil (or 1/3 c. applesauce + 1/3 c. oil)
4    eggs – lightly beaten
2    cups flour
2    teaspoons baking powder
1    teaspoon baking soda
1    teaspoon ground cinnamon
½   teaspoon salt
½  cup toasted walnuts (optional)

Heat oven to 350*. 
Mix bananas with brown sugar in large bowl. 
Add oil, then eggs. Mix until combined. 
Combine dry ingredients and add to the sugar and banana mixture – mixing until combined.  

Spread into a 11 x 15” pan that has been sprayed with cooking spray.
Bake for 30 minutes, or until lightly browned, and toothpick inserted into the middle comes out clean.  

Allow to cool for 1 hour before frosting with cream cheese frosting, and serving.

Cream Cheese Frosting
6 oz. cream cheese softened
2/3 c. butter, softened
2 t. vanilla
4 c. powdered sugar

Beat cream cheese, butter and vanilla in medium bowl on low speed until smooth.  Gradually beat in powdered sugar until smooth.

Spread over banana bars after they've cooled.

Sunflower cake

I came across this idea and decided to make it for my birthday, but with dimension, so I adjusted this recipe (just slightly) - some of which I liked, some of which - well, not so much. 

Here's my inspiration:  Cute huh?  In an abstract artistic sort of way.
While I loved theirs, I wanted to add more dimension  so I used two cake mixes, a 9x13", a 9" round, and a ramekin to bake the cake batter in.


2 cake mixes, any flavor - mix as directed
Starburst candies - yellow and orange
Chocolate chips (1 cup)
Gummy bears

Grease and flour a 9x13", 9" round baking pans, and 1 standard ramekin.

Grease the outer sides of an empty ramekin and place in the center of the round cake pan (this will allow the cake to cook more evenly and will provide dimension for the center).
Divide the batter between all three pans, filling the ramekin (not the one inside the round pan) only 2/3 full. 
Bake at 350* for 25-30 minutes.  Check at 20 minutes to make sure round and ramekin aren't already done.
Allow to cool for 10 minutes in pans, then remove from pans and allow to cool on cooling racks.

Place 9x13" cake on serving platter and frost with either a white base, or a chocolate base.
Using 9x13" as a base, place 9" round (which should be a ring once empty ramekin is removed from center) on top.
Frost with base frosting coat.
(Note - just because you might be sick of butter cream frosting and are too lazy to make more frosting is not an appropriate reason for you to use marshmallow cream - believe me - while in theory it looks good, it WILL NOT work as a base frosting for this cake - or any other for that matter - it will slowly slide and run right off of your cake and you will wish you'd listened).

Place ramekin sized cake into the center hole of the ring, and apply a chocolate base coat.
Cover the chocolate coat with chocolate chips.

Unwrap yellow and orange Starburst candies, and microwave one at a time for 6-8 seconds depending on the strength of your microwave (mine took 6).
After microwaving, place between two sheets of waxed paper and roll out with a rolling pin.
Trim with scissors into desired petal shape and place on cake - pinching one end to add dimension.
Layer petals as desired.
Use alternating gummy bear pattern to frame cake sides.
Here's a link to the original ideas


Monday, April 30, 2012

Strawberry Shortcake or Fruit & Cake Shish-ka-bobs

Looking for an easy, kid & adult friendly, yet distinctive dessert?

I saw this on Pinterest, and wanted to try it. My husband was dubious at best, but commented to me later on that he was surprised and had really enjoyed these fruit and cake shish-ka-bobs.
My kids loved helping make these too.

These are so versatile - you could do just about anything with them and the variations are endless.  For a party or function, these could be served buffet style and guests could skewer them themselves, and chocolate dipping sauce could be served on the side - so many options!


  For strawberry shortcake ke-babs, use an angel food cake, strawberries, white & dark chocolate.

Any cake of your choice (any flavor, store bought or homemade, even brownies or bar cookie chunks)
Strawberries, blueberries, blackberries, raspberries, bananas, pineapple - anything goes
Shish-ka-bob skewers
Melting chocolate or chocolate chips - white, chocolate, butterscotch (whatever you have, or want to use)
1-2 t. Shortening

Cut cake into cubes, approx. 1" x 1.5"
Slice fruit into bite size pieces (if necessary)
Slide cake cubes, and fruit onto skewers in alternating pattern
Place on cooling rack, with cookie sheet or paper below
Place chocolates in small microwaveable bowl, and add shortening
Heat chocolate at 50% power for 1-2 minutes, stirring frequently
Using spoon, (or piping bag) drizzle chocolate over cake and fruit
Repeat with chocolate of alternating color if desired


Posted by Picasa

Tuesday, April 17, 2012

Pico de Gallo

I really should be fired.

My sister asked me for a salsa recipe. She wanted one to can.
Fortunately, my friend makes salsa for me - in trade for my wheat bread. As such, I don't make salsa because his is amazing and he won't give me the recipe.

I do however make Pico De Gallo. Often. Very Often. I love the stuff - I could eat it by the gallon. I was horrified to discover that my blog was missing this recipe.


Once again, this is an 'un-scientific' recipe - meaning that I developed this recipe to perfection - according to my taste. Add more or less to suit your taste.


1 c. diced tomatoes
1 c. diced onion (white or yellow)
1 c. chopped cilantro
approx. 1/3 c. key lime juice
cumin
coarse salt

Optional: 1 - 4 finely chopped jalapeños (depending on how much heat you want)

Mix tomatoes, cilantro, and onion together in a bowl.
Add enough key lime juice (either from a bottle or freshly squeezed) to fill the bottom of the bowl approx. 1/4 inch from the bottom.
Add cumin and salt to taste. Mix thoroughly.


* Key limes are a MUST. They have a very distinctive flavor which is key to this recipe. (They look like mini limes.)

**This pico de gallo is fantastic on black beans, eggs, or with rice. It adds a great flavor boost to just about anything.

Scrambled eggs with pico de gallo

Every time I make pico de gallo, I get excited because I know that I'll be having scrambled eggs with 'morning after' pico de gallo for breakfast.


The great thing about 'morning after' pico de gallo is that the juices mix together and it lends such a great contrast and flavor to the eggs.

Here's a link to amazing pico de gallo.

Crack eggs, and cook over medium heat moving constantly.
Just as the eggs begin to loose their moisture, remove from heat. 
Salt and pepper to taste.

Top with pico de gallo, and don't be shy, make sure to get some of the juice in there too.
Morning bliss.
Posted by Picasa

Monday, April 16, 2012

Graham Cracker Cookies

My mom used to make these cookies for us as kids, and they are seriously the easiest cookies ever made & are great solution to left over frosting.
I had some left over frosting tonight and realized that this recipe is perfect for these. 
Perfect for a quick treat after school, or to send in a lunch box.
And did I mention that kids love them?
  

Graham crackers - cinnamon and sugar or plain (whatever is on hand)

Frosting

½ C Butter (1 stick)
3 ½ C Powdered Sugar
2 T Cocoa
¼ C Milk
1.5 tsp. Vanilla
Place butter in a small sauce pan and melt the butter. Add the milk and cocoa. Cook over medium heat, stirring constantly. Heat just until boiling. Remove from heat and add vanilla. Then, gradually add the powdered sugar. Stir until thickened.  Allow to cool for 3-5 minutes before spreading on graham crackers.  Cool, then break into halves (may be refrigerated). 
Wrap by twos in plastic wrap.
Posted by Picasa

Carne Asada Taco Salad

A lighter and less messy version of carne asada (eaten with forks, not hands), or a great use for second day carne asada.


Layer ingredients in the following order:

Romaine lettuce - coarsely chopped
Crushed tortilla chips, or crushed tostada shells
Grilled carne asada
Pico de gallo
Guacamole
Sour cream

Serve immediately
Posted by Picasa

Carne Asada Mojo or Marinade

I lived in Guatemala for a while many years ago, and learned that Guatemalans love carne asada. 
I honestly never really understood what that meant since the translation is: grilled meat.  I mistakenly thought this meant any meat and couldn't figure out what the big deal was.  Many years later, living in Colorado with lots of friends from Mexico, I finally learned what carne asada really means.
Super thinly sliced skirt or flank steak.  Perfectly marinated, and "just" cooked on the grill so that it is tender and juicy. The meant is served in a corn tortilla with refried beans, rice, pico de gallo, guacamole, & sour cream.

The easiest way to get the best meat for carne asada is to look in your area for a 'carniceria' (literally - meat market) ask them for 'aguayo' meat - this is the best for carne asada.  Then ask them to add their 'mojo' or 'marinade'.  They'll usually put the meat in a bag, add some marinade, and then you can let it sit in the fridge overnight or for a day or two.

If a carniceria isn't an option - Costco often sales carne asada (already in a marinade), or you can purchase thinly sliced flank or skirt steak and do your own mojo or marinade.

I usually have to slice my meat into halves or fourths just to get the thinness I need.
Here's a great recipe for the marinade/mojo (which tenderizes and adds great flavor)


Carne Asada Marinade or Mojo
1/4 c. key lime juice (the very small green limes)**this is key for the flavor
1/2 c. olive oil
2 T. white vinegar
4 garlic cloves - pressed or very finely diced
1/2-3/4 c. chopped cilantro
1/2 t. ground cumin
2 t. kosher salt (less if table salt)
Jalapeño or seranno chiles, minced (optional - to taste)
1/4 t. crushed red peppers (optional - to taste)
2 t. sugar (more or less to taste)

Using a fork, pierce meat, and place in non-metalic (reactive) container.
Cover with marinade/mojo, and turn.
Allow to marinate for at least 15-20 minutes, then turn and marinate on other side.
This may be refrigerated overnight, but bring to room temperature prior to grilling.

Heat grill, and cook for 2-5 minutes each side (depending on grill), so that meat is cooked, but still tender.
Place on a platter and cover with foil, and allow meat to rest so that the juices flow.
Note that the acids of the vinegar and the lime help 'cook' the meat during the marinade.  Also, pureed kiwi can be added to the mojo as it contains meat tenderizing enzymes.
Posted by Picasa

Oven Roasted Vegetables

My kids LOVED these.  My daugther who doesn't like vegetables actually asked to take some of these in her lunch to school today - and she told me that she really likes them.

The great thing about this recipe is that it works with virtually any vegetable you may have on hand.

5 carrots - scrubbed and peeled, sliced diagonally
2 large potatoes - scrubbed and chopped into 1.5 x 2" pieces
1 large onion - coarsely chopped
4-6 Mushrooms - halved or quartered
7-10 Asparagus stems - cut into 2-3" sections
2 coarsely chopped sweet bell peppers (red or yellow for color)
3 T. olive oil
2 t. seasoned salt
1/2 t. freshly ground pepper
Basil, thyme, or rosemary to taste

Heat oven to 375*
Combine all vegetables in a large bowl or pot.
Add olive oil and spices, and gently toss.


Pour into large 11 x 15" baking dish, and cover with foil.
Bake for 20 minutes.
Remove foil and gently stir.
Bake without foil for an additional 20 minutes or until tender.
Posted by Picasa

Friday, April 6, 2012

Deviled Eggs

So you've dyed 24 easter eggs - each a masterpiece in its own, but now with horror you wonder, 'what was I thinking?' 'What am I going to do with all of these eggs?'  'Whose doorstep can I leave these eggs on?' 'Is it possible to overdose on eggs?'

The solution my friend, is deviled eggs.
My kids who really don't care for eggs in any form, can't get enough of these babies. 
Neither can my friends.  I thought that 24 deviled eggs would be enough for a small kid's book club (picky eaters and all). Not so, I learned.

Prepare hard boiled eggs as follows:
Place eggs in pan.
Cover with cool water.
Add 1/4 t. salt.
Place on stove, and bring to a boil.
Reduce to a simmer and set timer for 13 minutes.
After timer beeps, immediately discard all hot water and plunge into ice water bath.
Allow to cool, changing water as needed as it heats. 
(You can place pot in sink and let cold water run into pot until cooled)
After they've mostly cooled, I generally shake the pan back and forth to begin cracking the eggs to perpetuate the future peeling.

For deviled eggs, peel eggs (adjust recipe +/- according to quantity).
Cut eggs in half lengthwise.
Gently remove yolks and place in a small bowl.
Set egg whites aside.

To the yolks add:
1-2 T. mayonaise
1-2 t. yellow mustard
1/2 - 1 t. horseradish (creamy/ground) (optional)
2 - 3 t. pickle juice (optional)
1-3 squirts hot sauce (such as Franks wing sauce) (optional)
Salt and pepper to taste
Paprika or Cayenne pepper

Mix with a fork until smooth, adding ingredients as desired, according to taste.
Spoon yolks into a piping bag, or into a sandwich bag (and snip off one 1/4" corner).

Pipe into empty egg white shells.
Sprinkle with paprika or cayenne (for a little more spice).
Keep refrigerated until serving.
Garnish with chopped chives or parsley.
 
Posted by Picasa

Monday, March 26, 2012

Rich and Decadent Chocolate Molten Lava Cakes


Oh Boy!
Warm, rich, chocolatey, gooey, and did I mention decadent?
You could seriously hurt yourself on these things.


I have a friend who is finishing up cooking school, and I stopped by her house to visit last night. She told me about the molten lava cakes she’d made earlier that day and showed me the recipe.

I’ve been wanting to try these for a while, and had even just bought ramekins for them.  I was thrilled to have her share her recipe with me - definitely tried and tested!

These are so easy that I was able to memorize the essentials since I didn't write it down.  My family LOVED them.  And the best part is that they are simple, quick and easy, yet they seem so elegant, and like you've been slaving in the kitchen.
Just remember 6, 6, ¼, 2, 1.  That’s it.

Chocolate Molten Lava Cakes - 4 servings
6 oz chocolate squares (the higher percentage of cocoa butter, the better) 
6 T. unsalted butter
¼  C. sugar
2 Eggs – lightly beaten
1 T. flour

Place chocolate, butter and sugar in a double boiler, and allow to melt.  Once chocolate and butter have melted, stir until thoroughly mixed. 

Remove from double boiler – allow a few minutes to cool, then beat eggs into chocolate mixture – taking care to mix quickly so that the eggs don’t cook. 

Add flour, and spoon batter into 4 ramekins that have been sprayed with a cooking spray. 

Bake in 400* oven for 12-14 minutes depending on your oven (mine took 14, but my friend said 12).  If they over cook, the molten lava center will be cooked and it will turn into a small cake or large brownie.  Time may be adjusted for desired thickness of lava.  Less time = more liquid, more time = less liquid center.  
You can see in the following photo that the center doesn't look 'quite set'.  

Remove from oven and allow to cool for 5 minutes.
Invert onto serving dish and serve immediately. 

Sprinkle with powdered sugar, or serve with a chocolate sauce, ganache, or fresh raspberries/fruit.


Posted by Picasa

Tostadas

I made these for dinner tonight and was amazed when my kids commented that this is one of their favorite meals!  Who knew?  This is probably one of the quickest dinners ever. 

My friend Berta served these to us years ago and it has become one of our staples - especially on busy evenings.
The base of the tostada looks like this:

You can find various brands, but they are pre-cooked and very crunchy and delicious - my kids even love to just snack on them.  You can generally find them near the tortillas in any grocery store.

This is my favorite cheese for these - you can find it at Walmart, Costco and most grocery stores.  It crumbles really nicely and is rather mild.


Tostadas
Refried beans or canned pinto beans
Queso fresco
Chopped onion, tomatoes, olives, cilantro, lettuce - all to taste

If using canned pinto beans, drain half of the liquid.  Heat a large pan, and add 2 T. olive oil.  Once hot, add beans and heat.  As the beans heat, use a potato masher or the bottom of a cup and smash all of the beans until they are smooth and spreadable - here's a link.   If using canned refried beans, simply spread a layer over the tostada.
Sprinkle with crumbled cheese, olives, tomatoes, onions, lettuce.
Optional :Top with sour cream and hot sauce to taste. 
Posted by Picasa

Wednesday, March 21, 2012

Chocolate Chip Cookie Cheesecake Bars

I stumbled across this recipe on Pinterest., and it looked pretty tasty.  I couldn't wait to try it.
The recipe I stumbled across however, called for refrigerated cookie dough - blech!  that makes me shudder.
I wanted to see how this would turn out using my own chocolate chip cookie dough recipe.


It got some pretty hearty reviews from my home.
Here's the recipe with a few tweaks (and real chocolate chip cookie dough)


In a Mixer Combine: 

2.5 C Brown Sugar
¾ C Butter Flavor Crisco (I use the cubes)
3/4 C. Butter
4 TBSP Milk
2 TBSP Vanilla extract
Mix ingredients
Add:
2 Eggs and mix again
In a Separate Bowl combine:
3.5 C Flour
2 tsp salt
1.5 tsp baking soda

Slowly add dry ingredients to wet ingredients and mix
Add 2-3 c. chocolate chips (more is better!)
Add 1/2 - 1 C butterscotch chips (optional)
Add 1 C. chopped nuts (optional)

Spray a 11 x 15" pan with cooking spray, and spread half of the cookie dough into the bottom of the pan.  
Cover with cheesecake filling

Cheesecake Filling
  • (8-ounce) packages cream cheese, softened
  • eggs
  • 3/4 cup sugar
  • 1 teaspoon vanilla extract
In a large bowl, beat together cream cheese, eggs, sugar, and vanilla extract until well mixed.

Spread over half of the cookie dough, then cover cheesecake filling with the remaining cookie dough.  Bake at 350* for 40 minutes or until center is done. 
Cool, then refrigerate. 
Cut into slices when well chilled.  


Posted by Picasa

Homemade Ravioli, Filling, and Red Pepper Garlic Alfredo Sauce

My kids love ravioli and tortellini, so with the kids on spring break, we decided to try our hand at making our own.  We made a basic pasta dough, and then came up with our own filling.


Dough

  • 3 cups unbleached white flour
  • ½ teaspoon salt
  • 2 eggs
  • ½ cup water
    Place flour and salt in a bowl and make a well in the center of the flour.Add 2 lightly beaten eggs, and begin to mix.  Add enough water to make a stiff dough.  While this recipe only calls for 1/2 c. water, I ended up putting almost 2.5 c. of water into mine.  So, depending on your humidity and altitude, you may need more or less. 
    Knead until smooth and mixed and place in a ziploc bag, or cover with plastic, and let sit for 30 minutes. 
    Working in sections, roll out dough (or use a pasta maker) into very thin sections. Fill with 1 tsp. filling.Using a pizza slicer, slice into sections.Fold dough over filling and seal the edges. Seal edges again with fork tines.  Edges may be moistened with milk or water if desired prior to sealing. 


Allow to dry for one hour.
Heat salted water to a boil.
Add raviolis, and cook until they float to the top; approximately 2-3 minutes.

Serve with an Alfredo sauce, marinara, or toss with clarified butter.

Sausage & Ricotta Ravioli Filling


1 c. sausage, browned, drained and crumbled
1 c. ricotta
2 eggs lightly beaten
1/2 c. red peppers finely diced
1 garlic clove - finely diced
2 T. green onions, finely chopped

Mix together and fill raviolis with 1 tsp.


Red Pepper & Garlic Alfredo Sauce

Melt 2 T. butter in skillet
Add 1/2 c. chopped red pepper and 1.5 t. finely chopped garlic.
Cook for 2-3 minutes, stirring.
Add 1/4 c. flour and mix until peppers and garlic are coated.
Slowly add 1-2 c. milk, stirring constantly as a roux forms.
Add 1/4-1/2 c. parmesean cheese.
Add milk to thin if necessary.
Add 1/2 t. ground nutmeg.

Spoon over cooked ravioli and garnish with fresh red peppers and sliced green onions.
Posted by Picasa

Panoramic Easter Eggs

My mom made these for us as kids and we loved them (but hated that we couldn't eat them)
My kids and their cousins made these last year and we had so much fun.  
This year I had to hunt for the recipe again, so here it is.  
The molds can be found in hobby or craft stores.


Sugar eggs
3.5 c. white sugar
1/2 c. powdered sugar
1 egg white

Whisk egg white in medium bowl until frothy.  If coloring is desired, add at this time.  As large amounts of sugar will be added, make colors more intense as the sugar will dilute the color.

Whisk sugars together in another bowl until well mixed.  Add to egg white mixture.
Continue to stir as sugar will gradually begin to dampen.  Mixture should be moist like damp sand, and should clump if squeezed in a hand.

Firmly pack sugar into egg mold making sure there are no air pockets or cracks.

Using knife or spatula, level top and remove excess sugar.

Place a plate or cookie sheet over molds, and invert.

Remove egg mold, and allow to dry for 1-2 hours at room temperature or place in 200* oven for 25 - 30 minutes.  If oven method is used, allow to cool.

Gently scrape a hollow into the eggs - solely leaving the outer shell - approx. 1/4 ".

Using royal icing as glue, add colored coconut for grass, and candies and small animal figurines.

After completing inner scene, using royal icing, glue sides together and decorate as desired. 

Monday, March 12, 2012

Cuban Sandwiches

So, remember that I live in Florida now.
My friend Fidel who is Cuban (seriously) served these to us a while back, and taught me how to make amazing Cuban Sandwiches (which I think is a big thing here).  

1 loaf cuban bread (looks like a long baguette, or long and skinny french bread)
2 eight oz. packages deli sliced swiss or baby swiss cheese
1-2 lbs deli sliced serrano ham (which can be substituted if it can't be found)
Bread and butter pickle slices
2 c. shredded pork
Butter
Mustard

Slice bread in half, and butter the insides well. 
Drizzle mustard on both sides of the bread, then working on one side, spread shredded pork. 
Layer pork with slices of ham (in a triangle layered fashion).
Layer ham with cheese slices (placed in opposite direction). 

Layer cheese slices with pickles in opposing direction.
Close sandwich, and butter the outsides of the bread. 
Cut in half, and heat in a panini press until cheese begins to melt. 
If a panini press is not available, heat on a griddle, pushing down with a spatula as this is a flattened style sandwich. 
Serve immediately. 


My friend Fidel used to own a restaurant and says that the secret to these is NO mayo.  Most places use mayo, but he says the mayo kills the sandwich.   Buen provecho!