Saturday, September 28, 2019

Super Simple Hashbrowns

These hashbrowns are incredibly simple with just 2 ingredients and some optional spices.

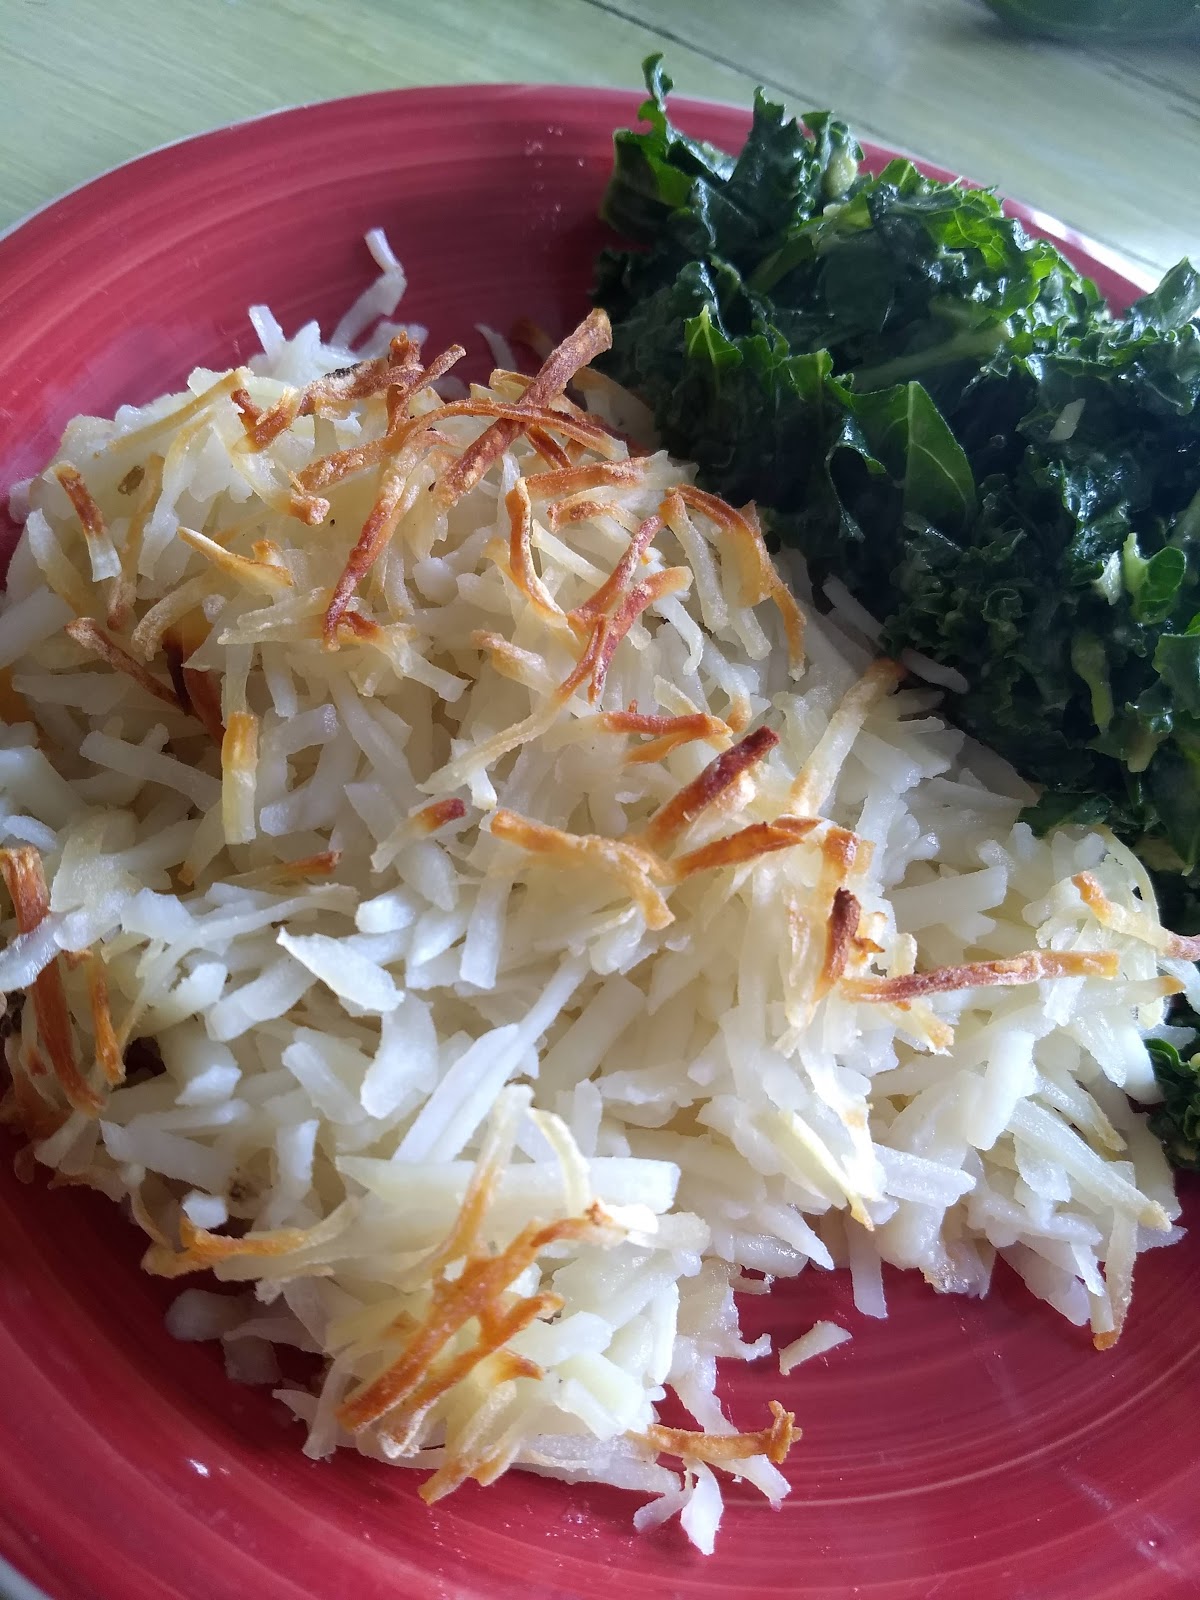
Pictured: Hashbrowns with Kale & Avocado Massaged Salad

For years I've tried a lot of different strategies for perfect hashbrowns - and I've repeatedly been disappointed. 
These hashbrowns are super easy (what's better than that? - no shredding, no grating, no rinsing and wringing out potato shreds). I also love that I can just throw these into the oven and forget about them - no tending or flipping or turning...they are a multi-tasker's dream!

And, the golden standard for our home - these are ALWAYS instantly devoured at our house, even by our kids who refuse to eat our plant based offerings. 


1 Package frozen shredded potatoes or hashbrowns* see note
6-13 oz canned coconut milk** see note

Optional
Sea salt to taste
Chopped jalapeno peppers - to taste
Chopped onions or onion powder to taste
Chopped garlic or garlic powder to taste
Black pepper to taste


Pour frozen hashbrowns into a large baking pan lined with a silpat or parchment paper. Depending on package size of potatoes, add enough coconut milk to very lightly/barely coat potatoes (see alternate option below). 
Season to taste with optional ingredients and lightly toss. 
Bake at 375* uncovered for approximately 35-40 minutes, until lightly browned on top. If desired, cook longer until bottom begins to crisp as well. Use oven's covection bake option if available. 

Alternate option - refrigerate coconut milk prior to use. Skim off coconut cream which rises to the top. Lightly melt cream in the microwave for 20 seconds +/- then and pour over potatoes and proceed as above.  


Notes
*When choosing the hashbrowns, make sure to find ones that are just potatoes without any mystery ingredients that are difficult to pronounce. I figure if I can't pronounce it, then it probably shouldn't be in my food. 
**I recommend Trader Joe's Organic coconut milk. It contains two ingredients - coconut and water - no thickeners or mystery chemicals. And yes, I'm probably the lady who cleaned out all of the coconut milk from Trader Joe's just before you got there - so sorry...we stock up every 3-4 months :) 


5 Ingredient, Plant Based Peanut Butter Cookies

Remember those delicious peanut butter cookies from your childhood? 
Here they are, in a simple plant based form. In this case, this means animal/dairy/egg/flour & gluten/oil/processed sugar free cookies. I know...it doesn't seem possible. 
Adding to the wonder - these babies are incredibly quick to make - dare I claim that they can be made and in the oven within 5 minutes? 
Simply add the ingredients to the food processor, push the button, shape into balls, lightly flatten and bake. Viola! 
If that wasn't enough incentive, you might just have all of the ingredients in your pantry already...so really, there's no excuse to not try these out! What are you waiting for? 
Go forth and bake!

1 can chickpeas - also known as garbanzo beans (drained)
1/3-1/2 cup 100% maple syrup
1 1/2 cups natural peanut butter (the kind without added oils or sugars)
1 tsp. vanilla
1/2 tsp. salt (optional)

Place all ingredients into a food processor and mix until smooth. 
Roll into balls and place on silpat or parchment paper lined baking sheet. 
Use the tines of a fork to add the classic criss cross pattern and slightly flatten cookies (there's no leavening, so they won't rise - don't depress too much). 
Bake in preheated oven at 350* for 12-15 minutes, or until slightly browned on edges. 
Remove to a cooking rack. 


Friday, August 16, 2019

Plant based pho

Oh my - it has been a REALLY long time since I last posted. Long enough for me to graduate with my masters degree, for summer to pass by (almost) and to start a new business, get licensed with the state and (almost) begin to feel like I'm starting to settle in. 

A couple of weeks ago during a family reunion, we decided to take a detour so that we could see some family in Salt Lake City. It was a quick drop in visit, but before arriving we had to find something to eat. Luckily we found an awesome restaurant and fell in love with their vegan pho. It was SO good and I can't wait to go back. 
In the meantime, here's the version we came up with. Pho, is a delicious broth (traditionally beef flavored) which is served over rice noodles and served with an incredible array of fresh herbs which make this an amazing meal. 


In a frying pan, toast the following whole spices for 3-5 minutes while stirring/tossing:
4 anise stars
4 cinnamon sticks
4 whole cloves
Add spices to a stock pot filled with 4 quarts (16 cups) of water
Bring to a boil 

Add the following to the boiling spices:
1 large or 2 medium onions (quartered)
4 minced garlic cloves
1 quartered and seeded jalapeno
A peeled, 4x2" knob of fresh ginger root, quartered
1 packet of pho spices (I found these at my local asian store)
Picture 1 of 6

Bring all ingredients to a boil. Remove jalapeno and then turn heat to medium and allow to simmer for approximately 30 minutes. 
Salt to taste and add 1-2 T. soy sauce

If making in advance, place this broth in a container, cover, and refrigerate overnight. 


Strain broth and bring to a boil. 

Thinly slice 4-6 shiitake mushrooms. Saute in 1 T. coconut cream until tender. 
Add sauteed mushrooms to pho broth. 
For additional and deeper flavor, add a few strips of dried seaweed or wakame to broth. Remove and discard after 5 minutes. 

Vegetables, herbs and noodles: 

4 - 6 cups of Napa Cabbage, coarsely chopped
1 bunch cilantro, chopped
1 bunch green onions - chopped including the green stalks
2-3 cups bean sprouts
3 bunches Thai basil
3 bunches Sweet basil
1 bunch mint leaves - chopped 
1 package rice noodles
Thai chili peppers
To assemble:
Heat 2 quarts of water until boiling. Pour over (covering) rice noodles and let sit for 3-5 minutes. 
Meanwhile, add chopped cabbage to boiling pho broth and cook for 3-5 minutes. 


Place noodles in the bottom of serving bowls.


Cover noodles with broth
Garnish with cilantro, mint, basil, thai basil, thai pepper, green onions, sprouts, key limes and salt to taste. 


Sunday, February 17, 2019

Carrot, ginger, sweet potato, tomato, spinach and banana microwave chips - no oil

I got so excited about making potato chips that I decided to see what else I could make into chips using my silpat and the microwave.

Here are my hits and misses:

Carrots:
Using a potato peeler, create thin carrot curls. Place on silpat and lightly salt. Cook for approximately 3-4 minutes in the microwave.
I thought these were pretty good. Some of them cooked quicker than others, and some were just a teensy bit humid still when I took them out. I will make them again. 

Ginger shreds: For the record, ginger doesn't slice very easily with a peeler due to the tensile and hairlike inner strands. I'm a big ginger fan, so these are awesome as they are easily crumbled and can be sprinkled in salads etc. 
This took approximately 3 minutes

Spinach: These leaves cooked quickly - in about two minutes. While I wasn't sure they were completely done (some were a little bit limp), many of them were plastered to the silpat and difficult to get off. In addition, some of the spinach stems turned black, and I saw some sparks and small flames. 

While I liked these, I'm not sure if I will make these again. They were too hard to peel off of the silpat and came off in crumbles. If I ever need spinach crumbles - these are my go to. 

Sun dried Tomatoes: 
I loved how these turned out. Interestingly though, they still came out a little humid and damp, even though in some areas, black lacing appeared. Perhaps my tomato slices needed to be more uniform. 

I'll definitely make these again, however I will possibly use the microwave at a mid power level rather than on high. 

Sweet potato chips: 
These are probably my favorite turnout of the lot. Thinly sliced, lightly salted, they cooked at around 3-4 minutes. Lightly salted, a sweeter version of a potato chip. 

This is a definite make again.

Finally, last but not least, banana chips: 
I sliced these as thinly as possible. I also cut them on an angle. When I cut them straight it got messed up with the inner makings of the banana. Trust me - the angle is easier. 
At first I didn't think these would work. I cooked them on high for about 4 minutes. They were so moist and almost boiling. Then I lowered the microwave power to half and cooked them for approximately 2-3 minutes longer. I just kept checking them. I didn't want them to burn, but I didn't want them soft and floppy either. 
As it turns out, while these look burnt, they were actually pretty perfect. They hardened as they cooled, and were a perfect blend of banana sugary like candy. And they were inhaled. Sticky and chewy in the teeth like toffee mmmm.  Definitely one we will do again. 


4 minute Potato Chips - no oil

I've been on a roll today - we've been experimenting in the kitchen and have had some great success. Unfortunately, I have no photos because these were wolfed down as quickly as they came out of the microwave. Let that be a testament. 
Crispy, light, salty - check on all. Truly everything a potato chip should be, but without the oil. These are perfect for an any-time snack. 
These are incredibly tasty when dipped into some plant based ranch dressing too! 

Ingredients:
Potatoes
Salt to taste

Tools:
Potato peeler or vegetable slicer
Silpat mat *
Microwave

Scrub potatoes. Using a potato peeler or vegetable slicer, thinly slice potatoes. Don't worry about peeling them. The thinner the slices, the better.
Arrange on a silpat mat, in a single layer.
Lightly salt/season as desired.
Microwave between 4-6 minutes.

*Note, parchment paper may be used if Silpat is not available.
To prevent discoloration and make crunchier, place potato slices into a bowl of cold water in between batches.


For the record, experimental cooking - fried egg on a silpat

This post is of a purely educational nature. I don't know if you aren't supposed to do this, I only know that I was super curious to see if it would work, and was thrilled to find that it did.

When we started to eat a plant based diet, fried foods definitely went out the window. Because we don't use coconut oil or cooking spray, most fried foods just weren't an option. Although we've used coconut cream we still hoped to figure out other alternatives at some point.

And so, today I experimented. I wondered if we could fry something on a silpat, on a griddle.
The answer is.....a resounding YES!! 

Here's the egg I fried... no oil, simply the silpat, and heat from the underlying griddle.

There was not sticking and the egg cooked perfectly. And yes, the silpat had some residue from the potato chips I had just been making with it in the microwave. Please just ignore that bit. :)

This experiment was a resounding success and I'm so excited to use the silpat to make my eggless french toast, and pancakes and everything that I want to fry, but don't because I don't use oil in my wfpb lifestyle!


Vegan Chick Pea Chocolate Chip Cookies - No Flour, Sugar, Oil or Milk


I know what you are thinking - garbanzo beans in chocolate chip cookies? Um...gross? 
I hear you. I was shocked when I first tried this recipe and before making a few tweaks of my own. I was skeptical of a cookie recipe that also didn't call for flower, and especially anything that could turn out without using processed sugar which often lends the structure to cookies. How could this be possible? 

Honestly, I have no idea, it is truly magical, and this recipe works! This recipe has become our favorite go to for chocolate chip cookies. I love that they don't have any flour (gasp), I love the natural ingredients, and that I can use the honey we harvest from our bees for this recipe. I also love that the chia seeds help the dough to stick together, and they add an interesting crunch and texture as well.

Place chick peas into a food processor and mix until blended into a smooth mixture. 
2 cans of drained chick peas

Add the following ingredients to the food processor and mix thoroughly:
1 1/4 cup creamy (all natural) peanut butter
1/2 cup raw honey
2 teaspoons baking powder
1/4 teaspoon salt
1 Tablespoon vanilla
3 Tablespoons chia seeds

Mix in the following:
1/2 cup organic, dried coconut (unsweetened)
1 cup vegan chocolate chips or cacao nibs (Enjoy Life or Pascha are two brands I like)

Drop by spoonfuls onto a silpat or parchment lined baking sheet, and bake at 350* for 15 minutes.
Cookies will be soft so allow to cool on baking sheet. They will firm up as they cool.


Vegan/Plant Based French Toast (No eggs or lactose)

I think we hit pay dirt this morning. While we've been eating a plant based lifestyle now for almost 2.5 years, there are just some comfort foods you miss. I went to bed last night wondering if aquafaba could be used to replace the eggs in french toast. And...it totally can. 
Loved waking up to these this morning. 


Sour dough or other no oil, no sugar, unrefined unbleached whole wheat flour bread
1/2-3/4 cups aquafaba (juice from a can of chick peas/garbanzo beans)
1/4-1/2 cup of Westsoy Plain, unsweetened soy milk
1/2 t. vanilla
1/4 t. cinnamon (to taste)
dash of salt (optional)
ground nutmeg and cardamom (optional - to taste)
coconut cream (from the top of a can of coconut milk) (so it doesn't stick to the griddle/pan)

Place aquafaba into a high powered blender such as a Vitamix and blend for a couple of minutes. It will froth, but it won't create peaks.
Pour into a shallow dish (such as a pie pan) and whisk in soy milk, vanilla and preferred spices.

Place slices of bread into this mixture and allow to soak up some of the liquid. Flip and repeat.

Cook on hot griddle - lightly greased with coconut cream to prevent sticking.
Flip halfway through cooking, and serve with 100% maple syrup.


Vegan/Plant Based Ranch Dressing - Oil and Lactose Free

Oh my heck. I tasted this and my brain started buzzing! This stuff gets an amazing creaminess from the cashews and tastes just like homemade buttermilk Ranch dressing.
This recipe is incredibly easy to whip up - but it requires some time in the middle - I usually just put it together before bed, then throw it together in 2 minutes the next morning. The total active time required to make this is probably only 10 minutes, however you will need to plan for 8-10 non-active  hours for the dressing base to cook and set.


Ranch Dressing Base:
1  of wbox (1 quart) Westsoy Soy milk (plain and unsweetened)
3/4 cups raw cashews
4 acidophilus capsules

Ranch spices - set aside
3/4-1 teaspoon salt (to taste)
1 teaspoon dried dill weed
1/4-1/2 teaspoon onion powder
1/4/-1/2 teaspoon garlic powder
black pepper - to taste

Place cashews in high powered blender (Vitamix) with one cup of soy milk. Blend until smooth. Add remaining soy milk and contents from acidophilus capsules and blend until well mixed.

Pour into pint or half pint glass jars and place in Instapot, using the yogurt setting and cook with the vent open (approximately 8-10 hours.)

Once it has cooled, pour /spoon into a mixing bowl and add the above spices - adjust to taste.
Return to jars or other container, cover and refrigerate.