Tuesday, June 21, 2011

Strawberry Pie

I received this recipe many years ago from a mom of one of the missionaries who was serving in our area.
My family literally fought over who got the last piece today.
Fresh strawberries, with a fluffy cheesecake like filling - a perfect way to celebrate the first official day of summer!
While this recipe needs a little bit of time to chill, 3-4 hours, the ingredients are simple and it doesn't take long to put together.
Best of all - it just looks beautiful


Wash and hull 20 +/- medium to large sized strawberries.
Cut into slices approx. 1/8-1/4 inch thick, and lay slices on a paper towel to absorb the extra water & juices.

In a mixing bowl, cream 8 oz. cream cheese, and gradually add 1/4 c. sugar
Add 1/2 c. sour cream, and 1 t. vanilla
Mix thoroughly
Gently fold in 1 c. cool whip topping

Place a layer of strawberry slices in the bottom of a graham cracker crust
(Pastry crust may be used, but it just isn't as amazing without the graham crust)
Top with cream cheese mixture
Arrange strawberries on top
Chill for 4 hours before serving


Posted by Picasa

Sunday, June 19, 2011

Boston Baked Beans

Pantry challenge #4.
Yesterday was a cheat day.  We had a garage sale, and then tuna fish sandwiches (from the pantry) for lunch.  Dinner was out of town with a cousin.
Day #5 - Sunday after church chili, and we'll be having pancakes for dinner  :)

Truly however, this post is about Boston Baked Beans - yum

Our daughter was baptized last week and we fed the troops for a couple of days.  We decided to have barbecued pork sandwiches for dinner Sunday evening, and I was looking for the perfect complement.  
I came across this recipe at all recipes.com. 

Here's what my kids said:
"Wow mom!, I've been looking for these beans my whole life.  Always trying them at different places, but this is the first time I've found them - these are my favorite!"
"Mom, these beans are awesome!!!" 
Need I say anything more?  

Honestly, my kids were literally begging me to let them at them 2 days before I was ready to serve them. 
Afterwards, we headed out camping for a family reunion, and I got requests from my brother in law to bring the left overs along.  
Definitely a hit. 
So, as I prepare to move, I thought I'd get them onto my online cookbook here so that I don't lose them.  I used pinto beans because that's what I had on hand.  I can imagine that navy beans would even be that much more amazing.  This recipe is scaled to feed about 12 people (but I found that it makes much more than I expected in reality)

  • 4 cups navy beans
  • 1 pound bacon
  • 2 onions, finely diced
  • 1/4 cup and 2 tablespoons molasses
  • 1 tablespoon and 1 teaspoon salt
  • 1/2 teaspoon ground black pepper
  • 1/2 teaspoon dry mustard
  • 1 cup ketchup
  • 2 tablespoons Worcestershire sauce
  • 1/2 cup brown sugar

  • Soak beans overnight in cold water. Simmer the beans in the same water until tender, approximately 1 to 2 hours. Drain and reserve the liquid.  

  • OR - rinse and sort beans, then place in pot - covered with water.  Bring to a boil.  Let boil 3 minutes.  Cover with lid, remove from heat and let steep.  
  • Drain water, cover with fresh water (this helps de-gas beans too) and boil for 1-2 hours until softened.  (This is the speedy method I used). 

  • Preheat oven to 325 degrees F (165 degrees C).
  • Arrange the beans in a 2 quart bean pot or casserole dish by placing a portion of the beans in the bottom of dish, and layering them with bacon and onion.

  • In a saucepan, combine molasses, salt, pepper, dry mustard, ketchup, Worcestershire sauce and brown sugar. Bring the mixture to a boil and pour over beans. Pour in just enough of the reserved bean water to cover the beans. Cover the dish with a lid or aluminum foil.

  • Bake for 3 to 4 hours in the preheated oven, until beans are tender. Remove the lid about halfway through cooking, and add more liquid if necessary to prevent the beans from getting too dry.


Friday, June 17, 2011

Food Pantry Challenge

We are moving in about a month.
So - I'm starting a food pantry/storage challenge.
We have a BIG (enormous, gigantic - you get the picture) food storage.  Just in case of emergency.
My goal is not to go to the grocery for anything other than fresh produce, milk, eggs, & bread.  I'm focused on using up what I have, before I go buy more stuff so that I'll have a ton to pack and move.

Anything in my fridge, freezer, pantry or food storage is game.
We'll see if I can last a month!  

I cleaned out my pan cupboard.  I now have about 4 pans to last me a month.  We'll see how I do - I should have remembered to keep a frying pan out.  Oh well.

Here's my progress so far:
Day 1
Tacos
I found old shells in my pantry - still in the plastic (even though they had passed their expiration date - shh..my family doesn't know that part).
Hamburger from the freezer - already cooked - just defrost and add taco seasoning.
Chopped lettuce, tomatoes, onions, & shredded cheese.
10 minutes  prep. (To bake and crispen up those taco shells and chop everything) and wallah! 

Day 2
Mexican Cheese Enchiladas
I found a brick of Mexican cheese in the fridge
Onion in the pantry
Enchilada sauce in the pantry
Corn tortillas on hand (I store them on top of the fridge)
Here's a link to the recipe, but the condensed directions follow.

10 minutes to prep - fry tortillas in olive oil.  Dip in enchilada sauce. Fill with cheese and onions & roll.
Bake 15 minutes to melt cheese.
Serve with shredded lettuce, sour cream, chopped tomatoes.

I'm liking this - and amazed (only day 2 you know) at what I'm coming up with so quickly!

Friday, June 3, 2011

Big Top - Giant Cupcake Cake & Tips


It all started with a cupcake pinata. It was all they had.
Well, other than sponge bob - which wasn't an option.

I bought the pinata, and tried to come up with a theme idea to work with the pinata.

We came up with Sugar and Spice and Everything Nice.
Lots of pink and white
Lots and lots of sugary sweet candy too.

I facebooked all of my peeps to see if anyone had the giant cupcake pan.
Luckly someone did, and let me borrow it.
She also told me that when she tried it - it didn't work.

A silicone cake pan with a somewhat sketchy history.... a little daunting.
I spent a lot of time online trying to figure out the secret to these cakes.

Many people said that pound cake recipes work great.
I don't have one of those.

I improvised.
Here's what I learned:

Use 2 (yes 2) regular cake mixes.
Instead of 3 eggs, use 2 for each mix. This will make the cake a little more dense, and not so light and fluffy. (Still good though)
Follow the rest of the cake directions as directed.
Liberally grease (spray) and flour silicone pans.
Preheat the oven to 325*. Make sure it reaches this heat before placing anything in the oven.

Fill top cake pan with about 2.5 cups of batter.
Fill bottom cake pan with approx. 3.5 cups of batter.
(Make cupcakes for the kids with remaining batter - I got about 9)

Place silicone molds/pans on a cooling rack.
Place cooling rack into a cookie sheet - preferably one that is smaller than the cooling rack.
Yes, it may seem a like it is perched a little precariously.
This helps ensure airflow and even baking.

Place both in the oven.
Remove top cake after approx. 45 minutes. Prior to removing from oven, check for doneness with a toothpick.
If the toothpick comes out clean when you poke it, the cake is done. If not, give it some more time.
Bake the bottom cake for at least an hour, and possibly and additional 10 minutes as well.
Give it the ol' toothpick test as well.

Remove from oven, and allow to cool for 10-15 minutes.
Gently twist and it should pop right out of the pan.

Allow to cool.

Cakes can be placed back in the pans once cooled. To remove inflated cake that rounds over the top of the pan, simply cut across, leveling knife with the top of the pan.  Use a serrated knife.

Assemble with frosting and decorate any old way you choose!
We thought it turned out great!

Here's my daughter's rendition.


Posted by Picasa

Sunday, May 29, 2011

Barbecue cookies, Memorial Day treats


I'm a stealer.  Yep, found these on a close acquaintance's blog (that would be one of my sisters). 
I really love novel foods.  This is one of them.  
I think we are going to make these for a barbecue - Memorial Day possibly? 
Simple, quick, novel...right up my alley. 
Thanks Ames.  I know...thou shalt not steal.  But then, how could I resist? 


What you need:

Vanilla Wafers
Grasshopper cookies
Frosting
Coconut 

What to do:

  • Scoop out frosting into three bowls.  Leave one bowl white and add red food coloring to one, and yellow food coloring to the other.
  • Take a vanilla wafer and spread white frosting on the bottom.  Make it sloppy.  You want the white to spill over the edge a bit.
  • Put one of the grasshopper cookies on top of the white frosting.
  • Spread yellow frosting on half the grasshopper cookie.
  • Spread red frosting on the other half of the cookie.  Remember, you want it to be sloppy and spill over the edges.
  • Put your shredded coconut in a bag with green food coloring and mix it all around to coat evenly.
  • Sprinkle some of the coconut on top of the red and yellow frosting. 
  • Put another vanilla wafer on top of the whole ensemble. 
  • Eat.
  • Repeat.

Friday, May 20, 2011

Southern Scramble - with Grits

My husband and I recently spent some time in South Carolina.  There we tried a myriad of foods.  Among them, fried pickles, fried okra, sweet potato french fries, sweet potato souffle, hash, ribs, barbecue (how could you visit the south without ribs or barbecue?), and my favorite GRITS.   
Honestly, several years ago I thought I'd try my hand at grits and had a disastrous experience with them.  We all thought they were pretty gross.

For some unknown reason, I put the box in the pantry and forgot about them.
When we returned from SC, I pulled out the box determined to figure out how to make these the right way since I'd enjoyed them so much.

Here's a recipe I found on the back of the box, that I just happened to have ingredients for on hand.

1.5 c. water
1/2 c. Quaker Quick Grits, uncooked
1 T. margarine or butter
1 c. shredded Swiss cheese
6 beaten eggs
1 c. cubed ham
2 T. sliced green onions (or whatever is on hand)
1/2 t. salt (optional)
1/8 t. pepper

In large skillet, bring water to a boil, and slowly stir in grits.  Reduce heat and simmer 3-5 minutes, or until thickened - stirring frequently. 

Stir in margarine. 

Combine 1/2 c. cheese with remaining ingredients; mix well. 

Pour into grits, stir lightly. 

Cook over medium heat until eggs are soft set and cheese is melted, stirring occasionally. 

Sprinkle with remaining cheese. 

Note - Once grits and egg mixture are combined, do no over mix.  

Serves 6

Posted by Picasa

German or Puff Pancakes


This morning I decided to make something domestic for my family since I've been out of town a lot in the past couple of weeks. It is nice to get back into my routine, and put something tempting on the table for my family.

While I have several recipes for german pancakes, most of them have a ton of butter and turn out super greasy.
I went in search of something new this morning, and happened across a recipe from The Food Network.
I actually followed this recipe almost to the T (not a common occurence), and I loved how it turned out. Due to the addition of a little bit of sugar and vanilla, this didn't taste eggy, and had more of a custard like taste.

Here's the recipe~hope you enjoy it as much as my family did - we'll be making this one over and over!

  • 3 large eggs
  • 1/2 teaspoon fine salt
  • 3 tablespoons sugar
  • 1 cup milk, warmed
  • 1 teaspoon vanilla extract
  • 2 tablespoons unsalted butter, melted (OR I Can't believe it's not butter)
  • 1 cup unbleached all-purpose flour
  • 2 teaspoons vegetable shortening
  • Confectioners' sugar, canned peaches or pears, berries, or maple syrup

Directions

Preheat the oven to 425 degrees F.  Place a well seasoned 10 inch cast iron skillet in the oven for 10 minutes (or as oven is preheating.)
In a medium bowl, whisk together the eggs, salt, sugar, milk, vanilla, and butter. Whisk in the flour to make a smooth batter.
Remove skillet from oven, and brush the inside with the shortening. Pour in the batter and bake for 15 minutes.
Lower the oven to 350 degrees F. and continue baking until puffed and golden brown, about 13 to 15 minutes more. Run a knife around the edge of the skillet. Sift the confectioners' sugar over the pancake. Serve immediately in the skillet with maple syrup, marinated berries, or glazed apples and pears.
Posted by Picasa

Saturday, April 9, 2011

Bumble Bee Birthday Cake

My daughter wanted a bumble bee birthday party, complete with the bee hive cake. After spending a lot of time on line checking out ideas, here's what I ultimately came up with.
I used two cake mixes - yellow and chocolate and reserved about 1/2 c. of each, then added the yellow to the chocolate, and the chocolate to the yellow and swirled it to create a marbled effect.  
I baked the cakes in 3 separate pans/dishes.  
For the base I used a glass pyrex bowl.  For the next layer, I used a cake mold I've had for several years.  You know, the doll or princess cake mold that makes the skirt, and you slip the doll top into...I just covered the hole at the base with parchment paper.  The top layer was a pyrex like small dish that I use to serve salsa or sour cream etc. in...all greased and floured liberally.  
I baked the smallest bowl for about 40 minutes and the larger ones for an hour.  After they'd cooled for 10 minutes, I removed them from the pans and let them cool completely.  
I ended up slicing the second layer in half (where it coned the most) and used it for a higher layer.  I assembled it all using a butter cream frosting.  
(And yes - this photo is sideways - I don't know why, and I don't know how to fix it.  I had other photos here, and they all 'broke') But, you get the picture. 


One of the ideas I found online suggested heating or melting my frosting (I just used a yellow buttercream - about 3 cups) and pouring it over the cake.  While it was a little weird, that's what I ended up doing.  At first, I thought it was a little gloppy (could've been too hot?) but it poured right over, but wasn't smooth or even, and left a few holes as it dripped down.  I decided a real beehive isn't truly symmetrical and perfect, and really liked the effect.

I placed it in the fridge and let it set.  The frosting actually became quite hard, and the flavor changed - it became yummier!

As the cake cooled, I went to work on the little bumblebees.  I'd seen several ideas online, but was still waiting for my inspiration.  I decided to use almonds and cover them with chocolate.  Just as I was ready to melt the chocolate, I had found my inspiration.  Instead of brown with yellow strips, I decided to go the other way.
I melted white chocolate bark and colored it yellow.  Then I dipped roasted almonds into the chocolate, and the placed them on parchment paper to dry.
I melted semi-sweet chocolate chips and drew stripes on each bee, and added yellow and white gumdrop slices for wings (I preferred the yellow in the end because the white looked too much like houseflies) - the chocolate stripes easily secured the wings.
I piped 2 white dots for eyes using royal frosting, and then added pupils with a toothpick and melted chocolate.  Really, they were super cute little guys, and really fun to make.  They reminded me of sesame street characters with their googly eyes.


And yes, some turned out better than others.  I was able to re-adjust them knocking off extra bits after it had dried.  
Today I affixed the bumblebees to the cake.  While I started out using royal frosting, I found that melted chocolate seems to glue things better in this case.
As a final touch, I added a few daisies.
The best part of all was that the cake was super cute, and tasted great too!


Friday, April 8, 2011

Ice Cream Tacos


Ice Cream Tacos??!!
I know - it just doesn't sound very appetizing - What a weird combination...
Although it doesn't sound great, we found this recipe many years ago in a 'Kid's Cookbook' by Pillsbury.  This is the second time we've taken these babies to school for a birthday treat and the kids were fascinated by the unusual prospect, and loved them.  As odd as the idea seems, the corn tortilla offsets the sweet ice cream, adding a delightful salty flavor as well as a fantastic crunch.

We made these the first couple of times strictly using chocolate chips for the chocolate part, but then I started using crushed up almond brittle, instead of the peanuts, and we REALLY love it this way.  Here's a link to the almond brittle. The almond brittle uses butterscotch chips which add a profound depth that satisfies without overpowering the chocolate.  Finally, this is a really fun kid friendly recipe - nothing too complicated for a kid.   Of course double or triple or quadruple this recipe as needed.   

 8 taco shells 
1/3 cup almond brittle, crushed
1/4 c. chocolate chips 
2 cups ice cream (any flavor)

 Heat oven to 350 degrees. 
Stand taco shells up in baking dish/pan. If needed, crumple up pieces of foil into balls, and stick them in pan to prop up taco shells. 
Heat taco shells for 5 minutes or until they are crisp and look light golden-brown. (If freezing these for a longer period of time or over-night, bake for 8-10 minutes to help retain crispness).  

Remove from oven, and let taco shells cool in pan for 10 minutes or until they aren't warm when you touch them. Leave taco shells in pan. 

Measure out almond brittle. Spoon 1 teaspoon into bottom of each taco shell. Reserve extra for later.  

Melt chocolate chips and spoon  into a small sandwich size plastic bag and set aside for a moment.   

Measure out 1/4 cup of ice cream. Carefully spoon 1/4 c. ice cream into each taco shell.  Sprinkle remaining brittle liberally over taco shells.

Snip a very small opening in the corner of the plastic bag of melted chocolate and drizzle chocolate over taco shells decoratively.  

Cover with foil and freeze for at least 15 minutes prior to serving. 


Monday, March 28, 2011

Faux buffalo hot wings

I wish my wings had looked like this: 

They didn't.  But, they tasted almost like it (except for the deep fried crunchy skin, and little bitty bones).   I fell in love with wings a couple of years ago when a JR Crickets opened near our home.  I was then devastated when they went out of business because I couldn't single handedly keep them in business - I tried though, I really did! 

I've been in wing mourning ever since. 

We were craving wings last weekend, and I decided to see what I could come up with.  Unfortunately, since I so rarely make wings, the wings in my freezer were old, gross, and frostbitten.  But we wanted wings!  
I decided to improvise and came up with a healthy 'ish' alternative.  Faux wings.  Here's the recipe - which I mostly snagged from Frank's Hot Sauce web page...I just changed the meat medium. 
(My camera is sort of on the fritz right now, so I only got the photo of the un-cooked faux wings)

Cut 7 -10 boneless, skinless chicken thighs into wing sized chunks and place on a foil lined pan on the bottom rack of an oven - preheated to 500* (that's not a typo)
Bake for 15-20 minutes, then remove and turn over once.
Bake for an additional 15-20 more minutes until thoroughly cooked.
Place in a bowl and toss to coat with Frank's Buffalo Hot Sauce.
Adjust amount according to taste.
Serve with chunky bleu cheese dressing (homemade is best)

At my old wing place mild, medium, & hot were solely determined by the amount of hot sauce added.


Monday, March 21, 2011

Heaven in a 11 x 15 or Chocolate Drop Cookie Bars or Chocolate Oatmeal Bars

I originally received this recipe from a friend of a friend... however, when I went to the blogpage to find the recipe again, it had mysteriously disappeared.

While disappointed about the disappearance, I was thrilled to find something very similar at Cooks.com. AND even better, I think that the following recipe may actually be BETTER than the original friend of a friend's recipe.

Chocolate Layer
1 c. chocolate chips
1 c. butterscotch chips
1 can sweetened condensed milk
1 tsp. salt
2 tbsp. butter

Cookie Layers
1 c. nuts
1 c. butter
2 c. brown sugar
2 eggs
2 tsp. vanilla
2 1/2 c. flour
1 tsp. salt
1 tsp. soda
3 c. oatmeal

Chocolate layer - on low heat, melt chips, milk, salt, butter.  Add nuts and set aside.
Cookie layer -
Cream butter and brown sugar.
Add eggs and vanilla and beat well.
Add flour, salt and soda.
Beat well and add oatmeal.
Spread 3/4 of batter in a 10 x 15 inch pan that has been sprayed with cooking spray or greased.
Spread chocolate mixture over cookie layer.
Drop remaining batter by teaspoonfuls on top.
Bake at 350 degrees for approximately 30 minutes (high altitude), or 30-45 minutes at sea level on a humid day. 

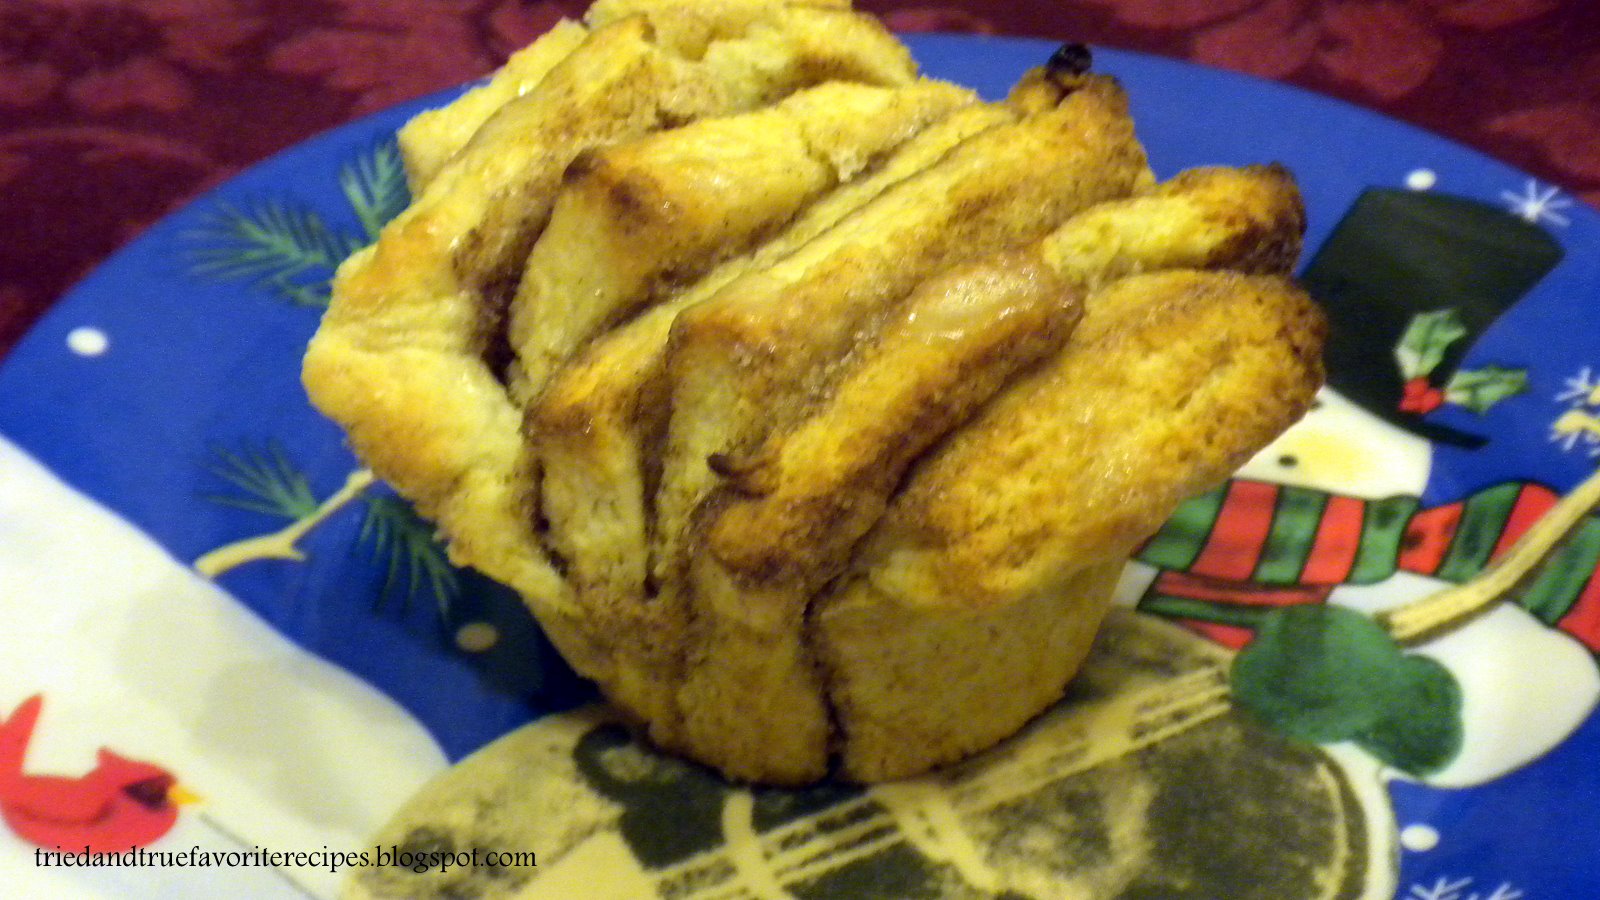
Cinnamon Biscuit Fans

As a wedding present, someone gave us a Betty Crocker's 'Best of Baking' cookbook.  At first, I was a little perturbed thinking - 'man, they think I don't know how to cook'.  However, over the years, I've grown very grateful for the fantastic recipes I've found in this cookbook.  
The following recipe is a classic that I come back to again and again.  This is a hybrid between a baking powder biscuit, and a cinnamon roll...not quite either, but a nice mix between.  Start to finish, this recipe takes me approx. 30 minutes - including the 16-18 minutes of baking.  This is also a great one to make with kids!


Mix flour, sugar, baking powder and salt together in a small bowl


Cut in butter, then add enough milk (about 3/4 cups) so that dough leaves side of bowl and forms a ball.
Turn dough onto slightly floured surface.  Gently roll in flour to coat.  Knead lightly 10 times. 


Roll into 12" x 10" rectangle.
Spread softened butter over rectangle.
Sprinkle with cinnamon - sugar.


Slice rectangle crosswise into strips - approx. 10"x2".
Stack strips starting from the middle, then alternating from each side, moving outwards.
Cut stack crosswise into 8-10 pieces.


Place cut sides up in greased muffin/cupcake pans.
Bake 16-18 minutes or until golden brown. 
Immediately remove from pan. 


Drizzle glaze (recipe below) over warm biscuits.

Cinnamon Biscuit Fans
1/3 c. firm margarine or butter
2 c. all purpose flour
2 T. sugar
1 T. baking powder
1/2 t. salt
Approx. 3/4 c. milk

Filling: 
3 T margarine or butter, softened
3 T. sugar
1 t. ground cinnamon

Glaze:
1/2 c. powdered sugar
2 - 2 1/2 t. milk


Heat oven to 425*.  Grease/spray 8 - 10 medium muffin cups.  
Mix dry ingredients, and cut 1/3 cup butter in using pastry blender (or 2 forks) until mixture resembles fine crumbs. 
Stir in just enough milk so dough leaves side of bowl and forms a ball. 

Turn dough on to lightly floured surface; gently roll in flour to coat.  Knead lightly 10 times.  Roll into a rectangle, 12" x 10".  Spread 3 T. softened butter over rectangle.  Mix sugar and cinnamon, and sprinkle over dough. 
Cut crosswise into 10" x 2" strips.
Stack strips starting with the longest one in the middle.  Then alternately from the middle, stack each side strip.  
Cut crosswise into 8 - 10 pieces. 
Place cut sides up in muffin cups. 

Bake 16-18 minutes or until golden brown. 
immediately remove from pan.
Drizzle glaze over warm biscuits. 

Glaze: 
1/2 c. powdered sugar
2 to 2 1/2 t. milk

Mix ingredients until smooth and of drizzling consistency.  


Posted by Picasa